스프링 보안은 어떻게2?? OAuth2 인증 서버 만들기
By on November 25, 2019
OAuth2 토큰 발급
이전 포스팅에서 SpringBoot OAuth2 를 이용하여 소셜 에서 인증을 받아서 나의 사이트에 로그인을 하는 기능을 살펴 보았습니다.
이번에는 third party 앱에서 나의 사이트에 접속하여 토큰을 발급 받고 인증을 할 수 있는 서버 기능을 추가 해보겠습니다.
환경 구성
-
기본 환경
- Spring-boot 2.2.1.RELEASE
- JDK 1.8 이상
- Maven
- 사용 가능한 IDE
- H2 Database
- PostMan (https://www.getpostman.com/)
- 예제 소스 : https://github.com/ParkHyeokJin/SpringRepo/tree/master/Spring-Security-OAuth2
- 완료 소스 : https://github.com/ParkHyeokJin/SpringRepo/tree/master/Spring-Security-OAuth2_Server
-
기능 목표
- 스프링 OAuth2 권한 부여 기능을 이용한 토큰 발급
-
Maven
 <dependencies>
     <!--스프링 OAuth2 의존성 추가-->
     <dependency>
     	<groupId>org.springframework.security.oauth.boot</groupId>
     	<artifactId>spring-security-oauth2-autoconfigure</artifactId>
     	<version>2.0.0.RELEASE</version>
     </dependency>
 </dependencies>
OAuth2 권한 부여 서버 기능 만들기
-
AuthorizationServerConfig 권한 부여 클래스 생성
클라이언트의 고유 토큰을 생성하는 기능을 만들기 위해 AuthorizationServerConfig 클래스를 작성 합니다.
AuthorizationServerConfig 클래스는 AuthorizationServerConfigurerAdapter 클래스를 확장 하고 있으며 토큰 발급을 위한 권한 기능을 설정 하고 관리 합니다.@EnableAuthorizationServer : 권한 부여 서버를 활성화합니다.
@Configuration @EnableAuthorizationServer public class AuthorizationServerConfig extends AuthorizationServerConfigurerAdapter { @Autowired private TokenStore tokenStore; @Autowired private AuthenticationManager authenticationManager; //실제로 인증을 하는 핵심 기능 @Autowired private PasswordEncoder passwordEncoder; @Override public void configure(ClientDetailsServiceConfigurer configurer) throws Exception { configurer .inMemory() .withClient("test-client") .secret(passwordEncoder.encode("test-secret")) .authorizedGrantTypes("password", "authorization_code", "refresh_token", "implicit" ) .scopes("read", "write", "trust") .accessTokenValiditySeconds(1*60*60) .refreshTokenValiditySeconds(6*60*60); } @Override public void configure(AuthorizationServerEndpointsConfigurer endpoints) throws Exception { endpoints.tokenStore(tokenStore) .authenticationManager(authenticationManager); } } -
리소스 서버 구성
사용자가 토큰을 이용하여 엑세스를 할때 체크를 하는 리소스 서버 입니다.
@EnableResourceServer : 리소스 서버를 활성화합니다
@Configuration @EnableResourceServer public class ResourceServerConfig extends ResourceServerConfigurerAdapter { private static final String RESOURCE_ID = "resource_id"; @Override public void configure(ResourceServerSecurityConfigurer resources) { resources.resourceId(RESOURCE_ID).stateless(false); } @Override public void configure(HttpSecurity http) throws Exception { http. anonymous().disable() .authorizeRequests() .antMatchers("/users/**").authenticated() .and() .exceptionHandling().accessDeniedHandler(new OAuth2AccessDeniedHandler()); } } -
MemberConfig 에 빈을 등록 합니다.
@Configuration @EnableWebSecurity @EnableOAuth2Client //@EnableOAuth2Sso public class MemberConfig extends WebSecurityConfigurerAdapter { @Override @Bean public AuthenticationManager authenticationManagerBean() throws Exception { return super.authenticationManagerBean(); } @Bean public TokenStore tokenStore() { return new InMemoryTokenStore(); } //......................... } -
테스트
테스트는 PostMan() 으로 진행 합니다. PostMan 은 cUrl 을 테스트 할때 매우 편리한 플랫폼 입니다.
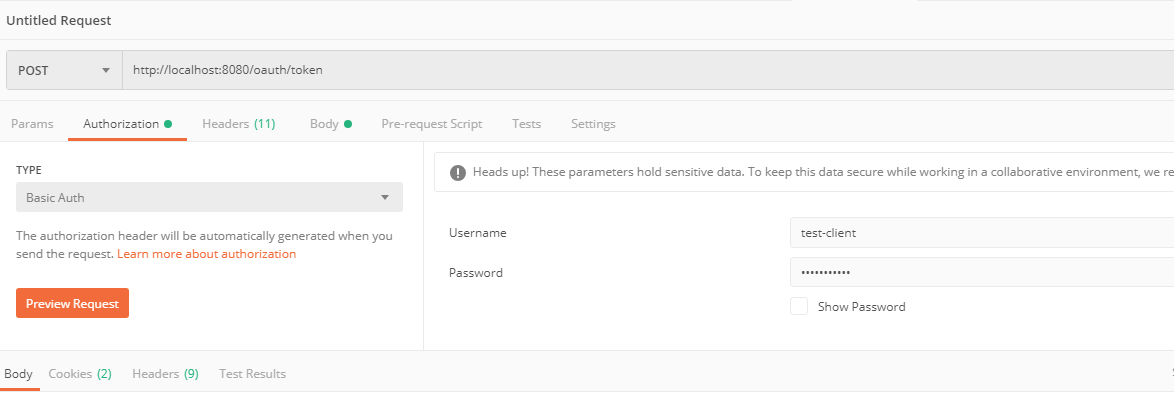
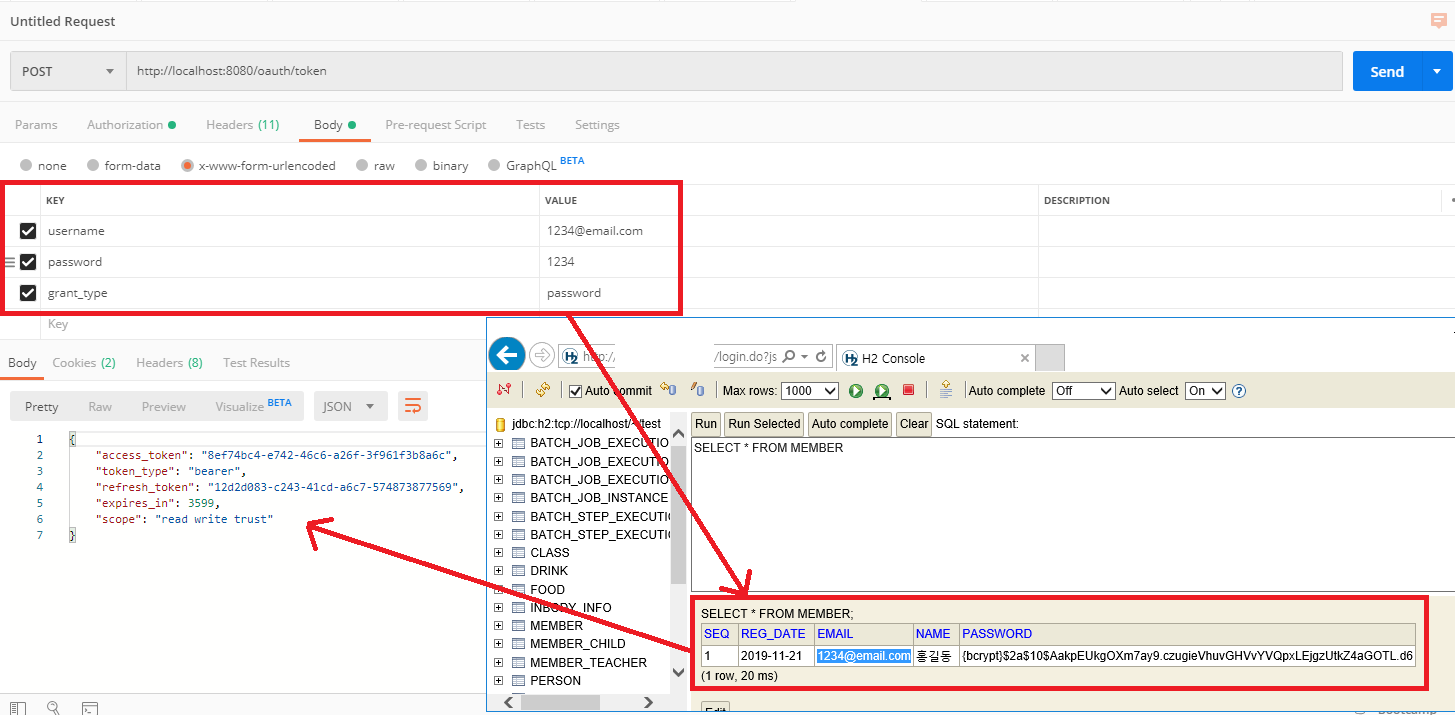
첫번째. 토큰 발급 시에는 AuthorizationServerConfig 에서 설정 했던 client_id 와 client_Pass 를 입력합니다. data 로 회원 정보 테이블의 유저 Id, Pass를 입력 하면 회원 테이블을 검색 하여 정상 유무를 판단 한뒤 아래와 같이 토큰이 발급 되게 됩니다.
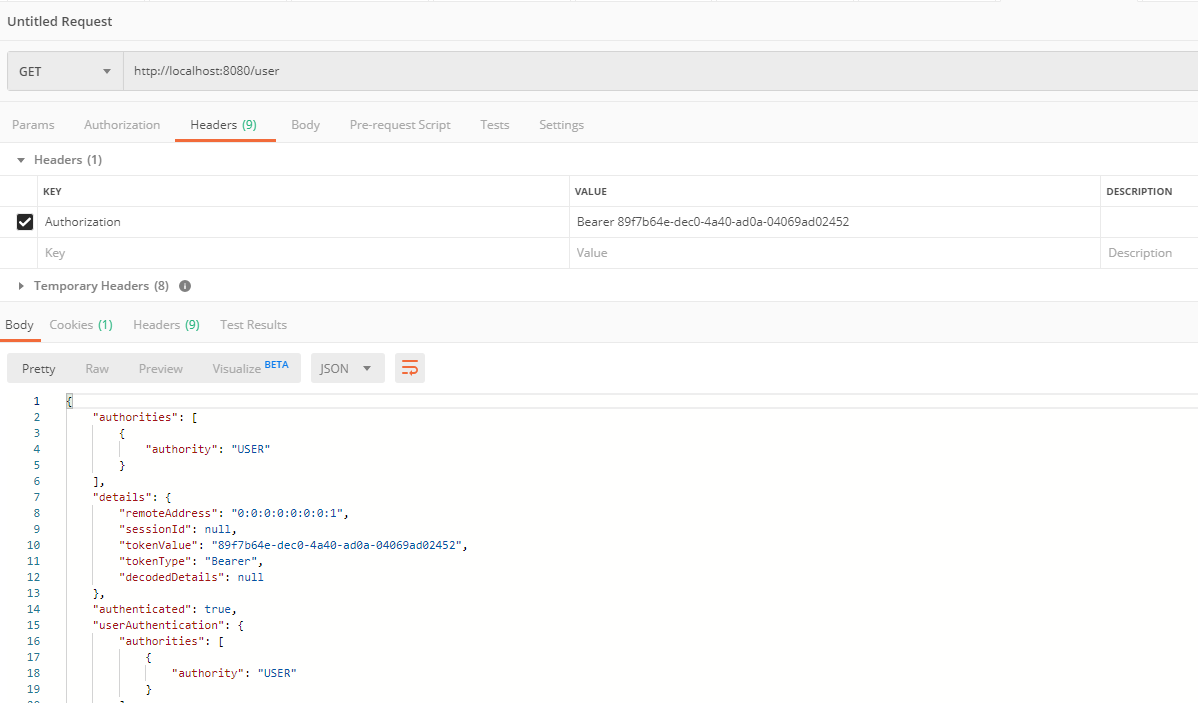
두번째. 토큰을 이용하여 인증 받은 후 유저 정보를 획득 할 수 있습니다. third party 앱에서는 획득 받은 유저 정보를 처리 하게 됩니다.
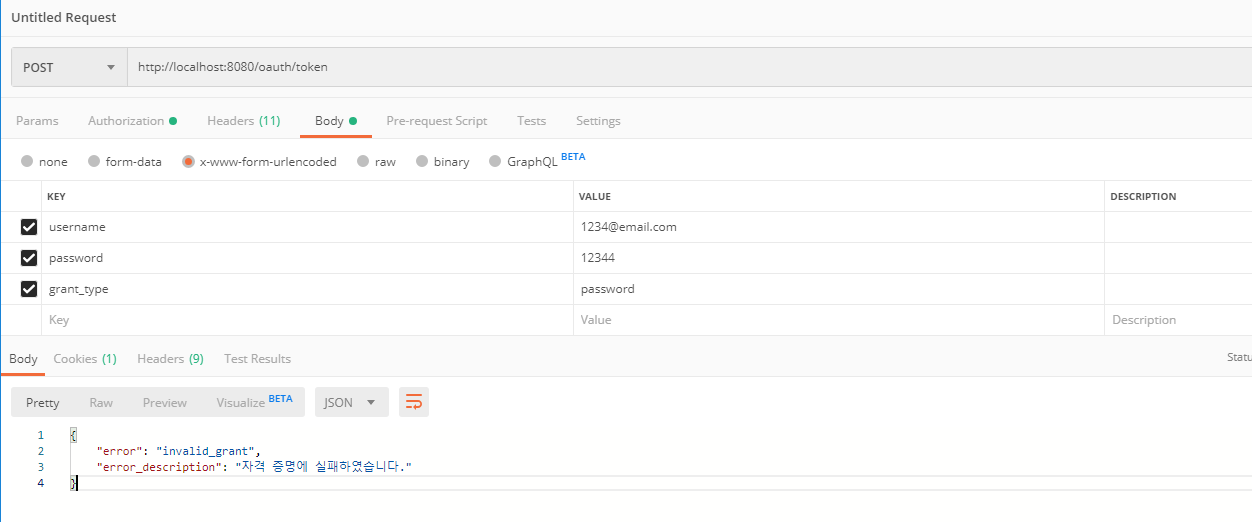
세번째. 토큰이 틀릴경우에는 아래와 같이 자격증명에 실패 하게 됩니다.
#JPA #JPQL #hibernate #Spring #SpringBoot #Developer #JAVA #BackEnd #FrontEnd #Batch #SpringBatch #Scheduler #Spring Security


